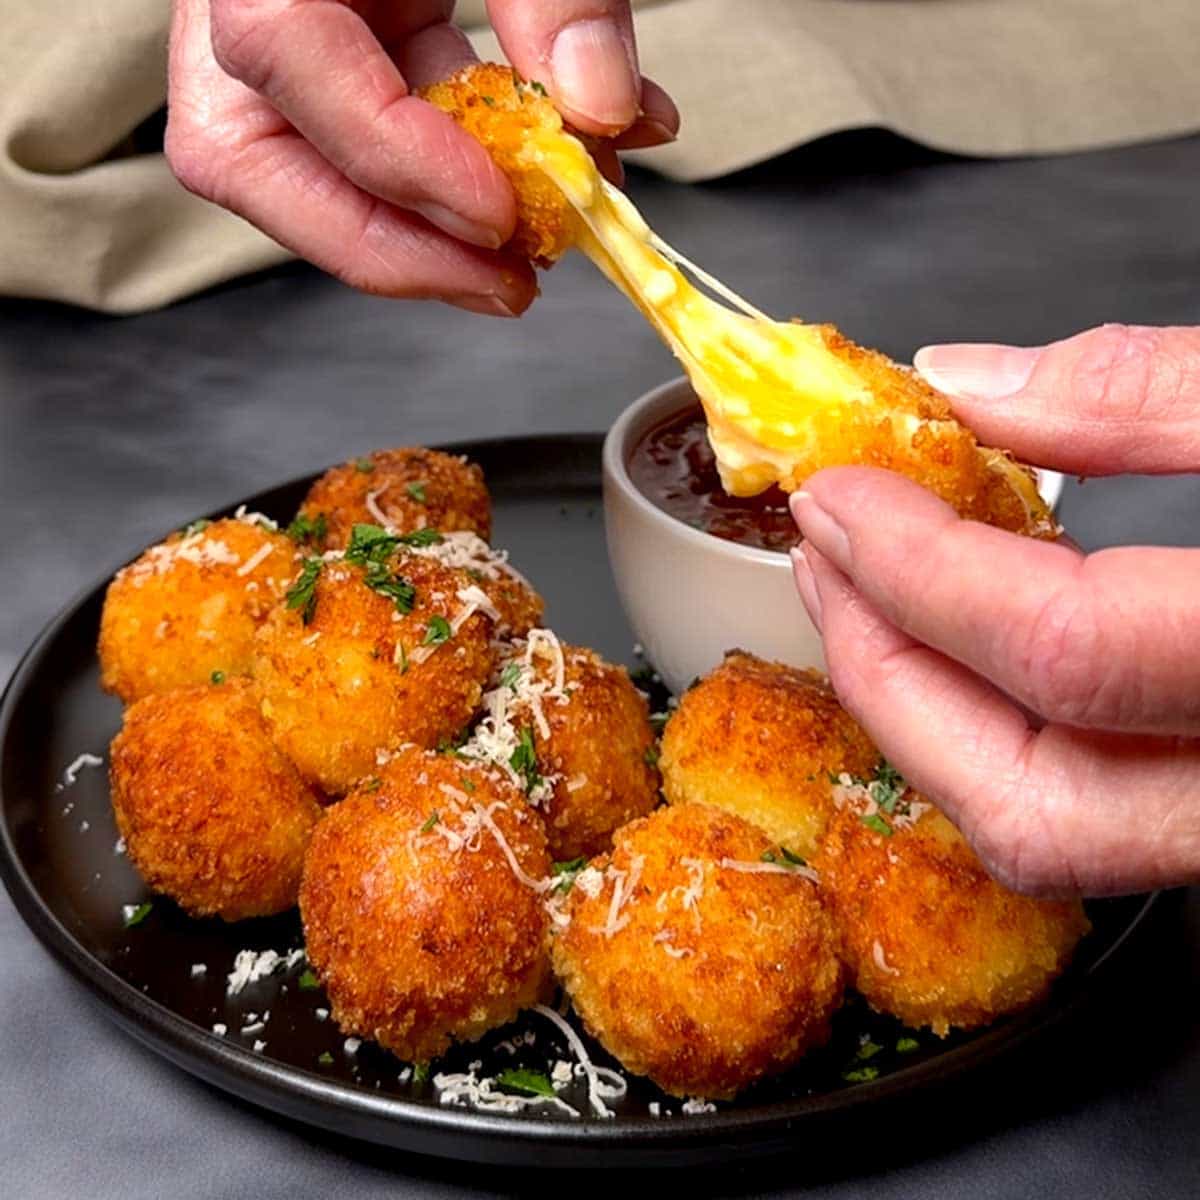
Ultimate Fried Cheese Balls: Get That Perfect Cheese Pull Every Time!
Imagine sinking your teeth into a perfectly golden, crispy shell, only to be met with an explosion of warm, melty, gooey cheese that stretches delightfully. That, my friends, is the magic of the ultimate
fried cheese balls. These irresistible little orbs are more than just a snack; they're an experience, a moment of pure culinary bliss that will have everyone reaching for more. Forget complicated recipes or store-bought imitations – with just a handful of simple ingredients and a little bit of time, you can create restaurant-quality appetizers right in your own kitchen that are guaranteed to impress.
From game day gatherings to elegant holiday spreads, or even just a well-deserved indulgent treat,
fried cheese balls are the undisputed champions of crowd-pleasing snacks. They disappear faster than you can say "cheese pull," so consider yourself warned: a double batch might be a necessity, not a luxury! The sheer joy on people’s faces when they discover the luscious, molten cheese core hidden beneath that satisfyingly crunchy exterior is truly priceless. Get ready to unlock the secrets to achieving that dramatic, Instagram-worthy cheese pull and crispy perfection without any leaks or mess.
The Science Behind the Perfect Cheese Pull (and No Leaks!)
Achieving the ideal crispy exterior and a gloriously gooey, stretchy interior in your
fried cheese balls isn't just luck; it's a careful dance of ingredients and technique. Understanding the "why" behind each step is key to mastering these delectable bites.
First, let's talk about the cheese itself. A blend of shredded mozzarella and sharp cheddar is the cornerstone. Mozzarella is the undisputed king of the cheese pull, offering that incredible stretch due to its high moisture content and melt-ability. Cheddar, on the other hand, brings a deeper, more complex flavor profile, adding a savory tang that balances the richness of the mozzarella. While you could use just mozzarella, the combination truly elevates the experience. For those looking to experiment, consider
Easy Fried Cheese Balls: Crispy, Gooey Perfection & No Leaks! where we explore other delicious cheese blends like adding a touch of Pepper Jack for a spicy kick.
Next, the unsung hero: cornstarch. This seemingly simple ingredient plays a crucial role in preventing your cheese balls from becoming a leaky, oily mess. When mixed with the shredded cheese, cornstarch acts as a binder, helping to absorb excess moisture and create a more cohesive, stable cheese base. It also helps to prevent the cheese from melting too quickly and oozing out before the exterior has a chance to crisp up. Think of it as a protective shield that keeps all that cheesy goodness locked inside until the very first bite.
Finally, the secret weapon for structural integrity: double chilling and double coating. The initial chill after mixing the cheese and cornstarch allows the mixture to firm up, making it easier to roll into uniform balls. The second chill, after the cheese balls have been double-coated in egg and Panko-Parmesan breadcrumbs, is absolutely critical. This step ensures that the coating sets firmly around the cheese, creating an impenetrable barrier that prevents any cheesy escapes during frying. It also contributes significantly to that incredibly crispy, golden crust that holds up even after cooling. Without these crucial chilling steps, you risk a deflated, cheese-less shell.
Mastering the Art of Fried Cheese Balls: A Step-by-Step Guide
Ready to transform simple ingredients into culinary gold? Follow this detailed guide to create
fried cheese balls that are crispy, gooey, and utterly irresistible.
Gather Your Ingredients:
*
For the Cheese Balls:
* 2 cups (about 8 oz) shredded low-moisture mozzarella cheese
* 1 cup (about 4 oz) shredded sharp cheddar cheese
* 2 tablespoons cornstarch
* 1 large egg, lightly beaten
*
For the Crispy Coating:
* 1 ½ cups Panko breadcrumbs (Japanese-style breadcrumbs for maximum crunch)
* ½ cup freshly grated Parmesan cheese
* 2 large eggs, beaten in a shallow dish
*
For Frying:
* 3-4 cups peanut oil (or other high smoke point oil like canola, vegetable, or sunflower oil)
The Step-by-Step Process:
- Prepare the Cheese Base: In a medium-sized bowl, combine the shredded mozzarella and cheddar cheeses with the cornstarch. Toss well to ensure the cheese is evenly coated. Add the lightly beaten egg and mix thoroughly until all the cheese is moistened and starting to clump together. The mixture will look a bit loose at this stage, but trust the process.
- First Chill: Cover the bowl and refrigerate the cheese mixture for at least 30 minutes. This chilling period is crucial as it helps the mixture firm up, making it much easier to handle and shape into perfect balls.
- Form the Cheese Balls: Once chilled, use a 1 ½ tablespoon cookie scoop (approximately 19 grams per scoop) to portion out the cheese mixture. Roll each portion gently between your palms to form smooth, compact balls. Arrange these formed balls on a parchment-lined baking sheet. Uniform size is important for even frying.
- Prepare the Coating Station: Set up a dredging station. In one shallow dish, place the 2 beaten eggs. In another shallow dish, combine the Panko breadcrumbs and freshly grated Parmesan cheese, mixing them well.
- Double Coat for Ultimate Crunch: This is a key step for that incredible crunch and a leak-proof seal. Take each cheese ball and first dip it into the beaten egg, allowing any excess to drip off. Then, roll it thoroughly in the Panko-Parmesan mixture, pressing gently to ensure the breadcrumbs adhere completely. Dip the ball back into the egg for a second time, and then roll it once more in the Panko-Parmesan mixture, pressing again. This double coating creates a thicker, more robust crust that locks in the cheese. Place the double-coated cheese balls back on the parchment-lined baking sheet.
- Second Chill (Crucial for No Leaks!): Return the entire baking sheet of coated cheese balls to the refrigerator for another 30 minutes. This second chill allows the breadcrumb coating to fully set and adhere, forming a firm barrier that will prevent any cheese from escaping during frying. Do not skip this step!
- Fry Until Golden Perfection: Heat about 1 inch of peanut oil in a heavy-bottomed skillet or large saucier over medium-high heat until it reaches 350°F (175°C). Use a kitchen thermometer to monitor the temperature accurately; maintaining the correct oil temperature is vital for crispy results and preventing greasiness.
Carefully lower small batches of 5 to 6 fried cheese balls into the hot oil. Avoid overcrowding the pan, as this will drop the oil temperature and lead to soggy results. Fry for 2 to 3 minutes, turning occasionally with a slotted spoon or spider, until they are beautifully golden brown and crispy on all sides.
- Drain and Serve: Once golden, remove the fried cheese balls from the oil and transfer them to a plate lined with paper towels to drain any excess oil. Serve them immediately while they are still hot and the cheese is wonderfully gooey.
Tips for Ultimate Success and Customization
To truly master the art of homemade
fried cheese balls and make them your own, consider these expert tips and variations:
*
Choose Your Cheese Wisely: While mozzarella and cheddar are a fantastic pairing, don't be afraid to experiment. Provolone, Fontina, or even a smoked gouda can add wonderful complexity. Just ensure your chosen cheese melts well. For a bit of heat, swap out the cheddar for Pepper Jack. The key is to use freshly shredded cheese rather than pre-shredded, as pre-shredded often contains anti-caking agents that can affect melt and texture.
*
Make-Ahead Magic: One of the beauties of this recipe is its make-ahead potential! You can form and double-coat the
fried cheese balls up to 24 hours in advance. Store them covered on a baking sheet in the refrigerator until ready to fry. For longer storage, freeze the coated cheese balls solid on a baking sheet, then transfer them to a freezer-safe bag. They can be fried directly from frozen (adding a minute or two to the frying time) or reheated from a chilled state. This makes them a perfect party appetizer. Learn more about their make-ahead friendliness in
How to Make Crispy, Melty Fried Cheese Balls (Make-Ahead Friendly!).
*
Serving Suggestions Galore: While marinara sauce is a classic companion, elevate your serving game with a variety of dips. Chipotle aioli adds a smoky, spicy kick, while hot honey offers a sweet and savory contrast. Other fantastic options include ranch dressing, a creamy pesto aioli, sweet chili sauce, or even a vibrant avocado crema. Garnish with a sprinkle of fresh chopped parsley or extra grated Parmesan for an elegant touch.
*
Alternative Cooking Methods: If deep frying isn't your preferred method, you can achieve delicious results with an air fryer or oven.
*
Air Fryer: Preheat your air fryer to 375°F (190°C). Lightly spray the coated cheese balls with cooking spray. Air fry in a single layer for 8-12 minutes, shaking the basket halfway through, until golden brown and crispy.
*
Oven: Preheat your oven to 400°F (200°C). Arrange the coated cheese balls on a lightly oiled baking sheet. Bake for 15-20 minutes, flipping halfway, until golden and the cheese is melted. While these methods won't give you *quite* the same deep-fried crispness and instant cheese pull, they are still wonderfully delicious and a healthier alternative.
*
Troubleshooting Tips:
*
Leaking Cheese: This usually means the cheese balls weren't chilled long enough, or the coating wasn't thick enough. Ensure double chilling and double coating.
*
Soggy Crust: Oil temperature is likely too low. If the oil isn't hot enough, the coating absorbs oil rather than crisping. Maintain 350°F.
*
Burned Outside, Cold Inside: Oil temperature is too high. The outside cooks too fast before the inside melts. Reduce heat slightly.
These
fried cheese balls are a testament to the fact that sometimes, the simplest pleasures are the most profound. With a little care and attention to detail, you can create a culinary masterpiece that will delight friends, family, and most importantly, yourself. Get ready to experience the ultimate cheese pull and savor every crispy, gooey bite!