Imagine biting into a perfectly golden, ultra-crispy orb, and as you do, a stream of incredibly hot, gooey, melty cheese stretches out, beckoning you closer. That, my friends, is the irresistible magic of homemade fried cheese balls – an appetizer so addictive, you might just want to hide them from yourself. Forget bland, store-bought versions; these crispy, melty delights are surprisingly simple to create, boasting a restaurant-quality finish that will have everyone convinced you're a culinary genius. And the best part? They are incredibly make-ahead friendly, meaning less stress on party day and more time enjoying the applause!
Whether you're gearing up for game day, planning a festive holiday gathering, or simply craving an indulgent snack for a cozy night in, these golden nuggets of pure melted goodness are about to become your new obsession. With just a handful of common ingredients and a clever technique that prevents messy leaks, you'll achieve that coveted dramatic cheese pull and an outer crunch that holds up beautifully.
Unlocking the Magic of Perfect Fried Cheese Balls
What sets these fried cheese balls apart from the rest? It's a combination of smart ingredient choices and a meticulous method designed for maximum flavor and textural pleasure. We’re talking about an appetizer that delivers on every front: visual appeal, delightful aroma, and an explosion of taste and texture.
The Ultimate Cheese Pull: A Symphony of Melty Goodness
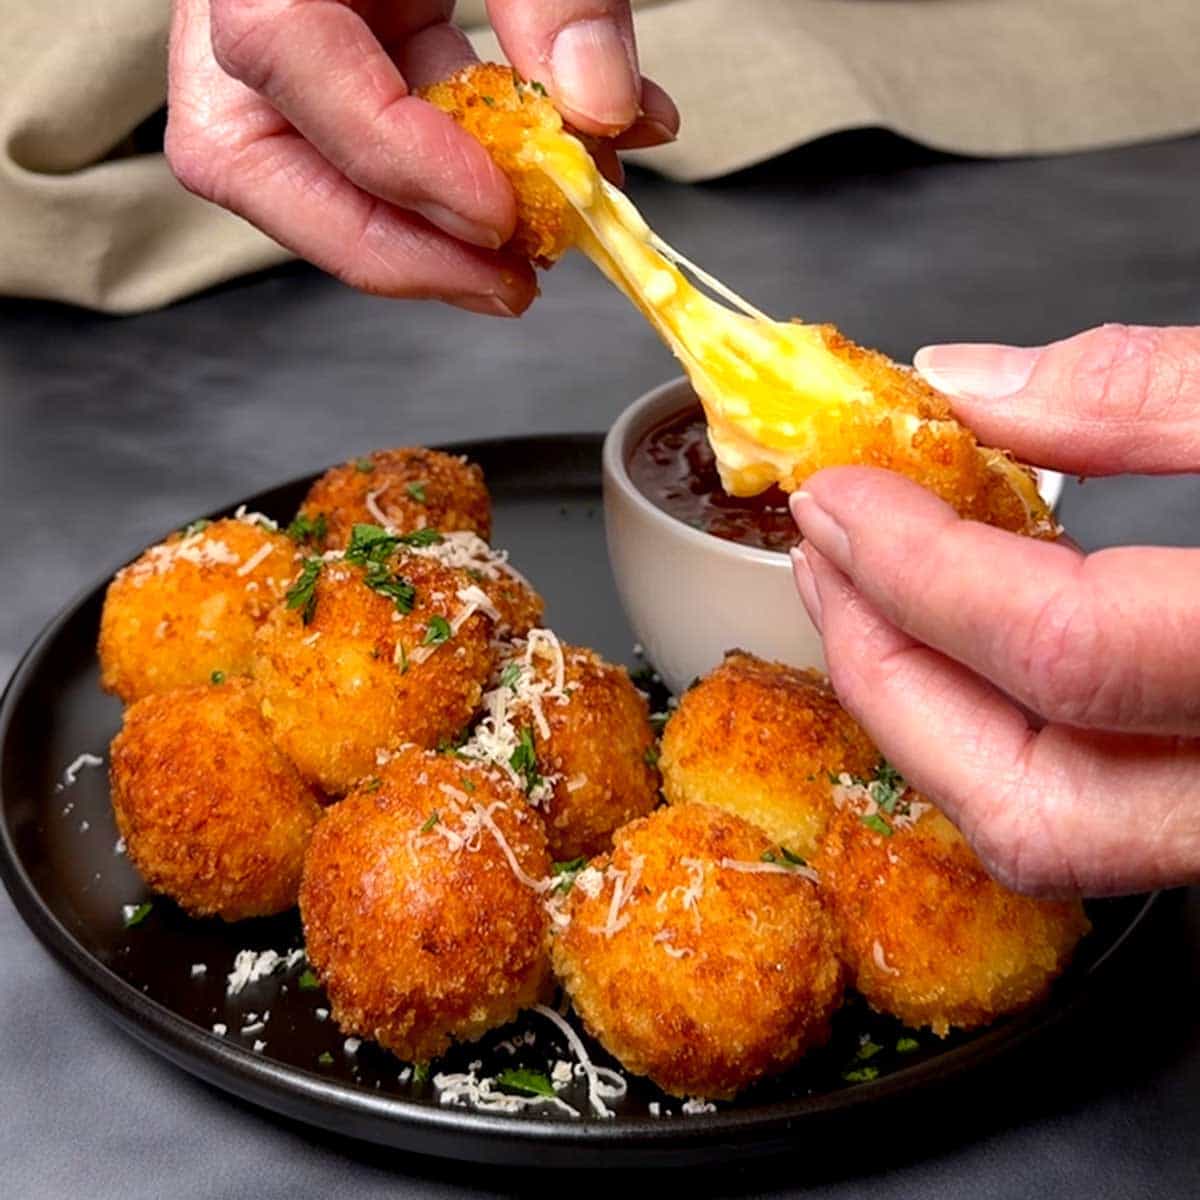
The heart of any great cheese ball is, naturally, the cheese! This recipe leverages a power duo: creamy mozzarella for its unparalleled stretch and sharp cheddar for a depth of savory flavor. This combination ensures that every bite provides that Instagram-worthy, elastic Ultimate Fried Cheese Balls: Get That Perfect Cheese Pull that everyone craves. The moment your guests break through the crispy crust and witness that glorious, stretchy cascade of melted cheese, you'll know you've hit a home run.
Crispy Coating That Stays Crunchy, Even After Cooling
The secret to an enduringly crisp exterior lies in a double-coating technique using Panko breadcrumbs. Panko, a Japanese-style breadcrumb, is lighter and flakier than traditional breadcrumbs, resulting in a superior crunch that isn't greasy or heavy. Infusing these breadcrumbs with freshly grated Parmesan cheese adds another layer of nutty, savory flavor, elevating the entire experience. This robust coating isn't just about crunch; it also forms a protective barrier, keeping the molten cheese securely inside.
No Leaks, No Fuss: The Secret to a Perfectly Encased Treat
One of the most common frustrations when frying cheese is the dreaded "leak" – cheese escaping its shell and melting into the oil. This recipe ingeniously tackles that problem. The addition of a touch of cornstarch to the cheese mixture acts as a binding agent, helping the cheese maintain its form under heat. Coupled with a critical double-chilling process, the cheese balls are fortified against leaks, ensuring every single one emerges from the fryer as a perfectly intact, golden sphere. Learn more about preventing leaks in our detailed guide: Easy Fried Cheese Balls: Crispy, Gooey Perfection & No Leaks!
Gathering Your Ingredients: Simplicity Meets Indulgence
You’ll be amazed at how such an impressive dish can be created with such a short and simple ingredient list. Quality ingredients are key here, especially when it comes to the cheese!
For the Irresistible Cheese Core:
- Shredded Mozzarella: The undisputed champion for that epic cheese pull. Opt for low-moisture, part-skim mozzarella for best results.
- Shredded Sharp Cheddar: Adds a tangy, rich flavor and a beautiful golden hue to the melted interior.
- Cornstarch: The unsung hero that binds the cheese, preventing leaks and ensuring a firm, yet melty, consistency.
- One Egg: Helps to further bind the cheese mixture and creates a cohesive base.
For the Golden, Crispy Exterior:
- Panko Breadcrumbs: Essential for that superior, light, and airy crunch.
- Freshly Grated Parmesan Cheese: Elevates the coating with a salty, umami kick. Avoid pre-grated Parmesan in a can, which can have an off-flavor and texture.
- Two Eggs: Used as the wet binder for the Panko coating, creating a strong adhesive layer.
For Frying to Perfection:
- Peanut Oil: Our top recommendation for frying. It has a high smoke point and a neutral flavor, perfect for achieving a consistently golden-brown, crispy crust. Vegetable, canola, or sunflower oil are also suitable alternatives.
Your Step-by-Step Journey to Fried Cheese Ball Perfection
Follow these detailed steps to create flawless fried cheese balls that are crispy on the outside and wonderfully gooey within.
Step 1: Building Your Cheesy Foundation
In a medium-sized bowl, combine your shredded mozzarella and sharp cheddar cheeses. Sprinkle the cornstarch over the cheese and toss gently to ensure every strand is lightly coated. This initial coating is crucial for preventing leaks. Next, crack in one lightly beaten egg and mix thoroughly until the cheese is evenly coated and slightly tacky. It will appear loose at this stage, but don't worry – chilling will firm it up. Cover the bowl and refrigerate for at least 30 minutes. This allows the cornstarch to fully hydrate and the cheese to become more manageable.
Step 2: Forming Uniform Golden Orbs
Once your cheese mixture has chilled, it's time to form the balls. Using a 1½ tablespoon cookie scoop (approximately 19 grams per ball) will help ensure uniform size, which is essential for even cooking. Scoop the mixture, then gently roll it between your palms to form compact, smooth spheres. Arrange the formed cheese balls on a parchment-lined baking sheet, making sure they don't touch. This prevents them from sticking and makes the coating process easier.
Step 3: Crafting the Perfect Crispy Armor
Prepare your breading station. In one shallow dish, beat the two remaining eggs until well combined. In a second shallow dish, mix the Panko breadcrumbs with the freshly grated Parmesan cheese. Take each cheese ball and dip it into the beaten egg, allowing any excess to drip off. Then, roll it thoroughly in the Panko-Parmesan mixture, pressing gently to ensure the crumbs adhere completely. For an extra-crispy, leak-proof coating, repeat this process: dip in egg again, then roll in the Panko mixture a second time. This double layer is key to achieving that restaurant-quality crunch.
Step 4: The Essential Double Chill
After coating, return all the cheese balls to the parchment-lined baking sheet. Place them back in the refrigerator for another 30 minutes. This second chilling period is absolutely vital. It allows the breadcrumb coating to set firmly, creating a robust barrier that will prevent the cheese from oozing out during frying. Don't skip this step!
Step 5: Frying to Golden-Brown Bliss
Heat about 1 inch of peanut oil in a heavy-bottomed skillet or large saucier over medium-high heat. Use a deep-fry thermometer to monitor the oil temperature, aiming for a consistent 350°F (175°C). Maintaining the correct temperature is crucial for even cooking and a crispy, non-greasy result. Once the oil is hot, carefully add the fried cheese balls in small batches of 5-6 at a time. Overcrowding the pan will drop the oil temperature and lead to soggy, unevenly cooked cheese balls. Fry for 2-3 minutes, turning occasionally with a slotted spoon, until they are beautifully golden brown on all sides. Remove them from the oil and transfer them to a plate lined with paper towels to drain any excess oil. This ensures maximum crispiness.
Make-Ahead Friendly: Entertain with Ease
One of the most appealing aspects of these fried cheese balls is their make-ahead capability. You can prepare and coat them completely, then store them until you're ready to fry. Simply arrange the fully coated (and double-chilled) cheese balls on a baking sheet, cover tightly with plastic wrap, and refrigerate for up to 24 hours. When it's party time, just pull them out and fry as directed.
For longer storage, these cheese balls freeze beautifully. Once coated and chilled, place them on a parchment-lined baking sheet in the freezer until solid (about 2-3 hours). Once frozen, transfer them to an airtight freezer bag or container. They can be stored in the freezer for up to 3 months. When ready to serve, you can fry them directly from frozen, adding a minute or two to the cooking time, or thaw them in the refrigerator overnight before frying. Reheating cooked cheese balls can be done in an oven at 350°F (175°C) for 8-10 minutes or an air fryer at 375°F (190��C) for 5-7 minutes until heated through and crispy.
Serving Suggestions & Creative Twists
These fried cheese balls are fantastic on their own, but pairing them with a delicious dipping sauce takes them to the next level. Classic marinara sauce is always a hit, offering a bright, acidic counterpoint to the rich cheese. For those who enjoy a little kick, a smoky chipotle aioli or a sweet and spicy hot honey are fantastic choices. You could also try a creamy ranch dressing or a tangy blue cheese dip.
To garnish, a final sprinkle of freshly grated Parmesan cheese and a dash of vibrant, chopped fresh parsley adds a touch of elegance and freshness. Don't be afraid to experiment with the cheese blend itself; pepper jack can replace cheddar for a spicier kick, or use all mozzarella for a truly unparalleled stretch. For an herbaceous twist, finely chop some fresh chives or dill into the cheese mixture before forming the balls. The possibilities are endless!
Troubleshooting & Expert Tips for Success
- Oil Temperature is Key: Invest in a deep-fry thermometer. If the oil is too cold, the cheese balls will absorb too much oil and be greasy. If it's too hot, the exterior will burn before the cheese inside is fully melted and gooey.
- Don't Overcrowd the Pan: Fry in small batches to maintain optimal oil temperature and ensure even cooking. Patience here pays off!
- Drain Well: Always place fried items on paper towels or a wire rack set over paper towels immediately after frying to wick away excess oil.
- Cheese Choices: While mozzarella and cheddar are a perfect pairing, feel free to experiment. Just using mozzarella is wonderful, and pepper jack or even a bit of Monterey Jack can be excellent substitutes for cheddar. Avoid very soft or high-moisture cheeses, as they are more prone to leaking.
- Air Frying Option: While frying yields the crispiest result, you can air fry these. Preheat your air fryer to 375°F (190°C). Lightly spray the coated cheese balls with cooking spray, then cook in a single layer for 8-12 minutes, shaking the basket halfway through, until golden brown and heated through. Results will be slightly less crispy than deep-fried, but still delicious!
There you have it – the ultimate guide to creating crispy, melty, utterly irresistible fried cheese balls right in your own kitchen. This recipe is more than just a snack; it's an experience, a moment of pure culinary delight that brings smiles to faces and joy to gatherings. With the make-ahead convenience, you can impress guests without the last-minute scramble, leaving you free to enjoy the "oohs" and "aahs" as they discover that perfect, dramatic cheese pull. So go ahead, unleash your inner chef, and prepare for these golden orbs of happiness to become your new entertaining staple!
